Contents
- Log Entry 01: The Vault Assessment
- Log Entry 02: Environmental Control and Triage
- Log Entry 03: Chemical Stabilization and Cleaning
- Log Entry 04: High-Resolution Digitization
- Log Entry 05: Metadata and Contextualization
- Log Entry 06: The Final Frame
Log Entry 01: The Vault Assessment
Cellulose acetate film can begin releasing acetic acid between 40 and 45 years of age when stored at ambient temperatures of 21°C to 24°C. A collection that appears stable from across the room may already be degrading from within its film cans and paper sleeves.
Location: Main Archive Room | Temp: 22°C | Humidity: 55% | Assessment: Sub-Optimal
The first signs sit low in the sensory register: a faint vinegar odor, a roll that resists lying flat, or a sleeve carrying a pale trace of transferred emulsion. In an archive of 35mm negatives from early Asia-Pacific conflict zones, these changes place more than photographic objects at risk. The frames may contain destroyed streets, military positions, civilian displacement and faces absent from the formal record.
The immediate task is to establish the film base, condition and documentary priority of each roll. Assuming all 35mm film bases degrade at the same rate ignores the chemical stability differences among early nitrate, cellulose acetate and modern polyester stocks. Base identification therefore precedes cleaning, scanning or rehousing.
Acetate Priority
A vinegar odor signals active chemical decay. Isolate the affected roll before opening adjacent sleeves repeatedly, and record its original position so the archive’s physical order can later be reconstructed.
Curling and fading make the mission time-sensitive. As the acetate base shrinks, the silver gelatin emulsion experiences mechanical stress. Separation can follow, leaving fractured or detached image areas that no scanner can recover. The preservation objective is clear: stabilize the object, capture the remaining visual evidence and preserve its relationship to the surrounding archive.
Log Entry 02: Environmental Control and Triage
Location: Stabilization Chamber | Temp: 18°C | Humidity: 35% | Assessment: Archival Standard
Reducing storage temperature to 18°C and holding relative humidity within a strict 30–35% range slows the autocatalytic degradation process by a factor of four compared with standard office environments. That change buys inspection and digitization time, provided the archive reaches the new environment gradually and remains clearly segregated by condition.
Sort Before Treatment
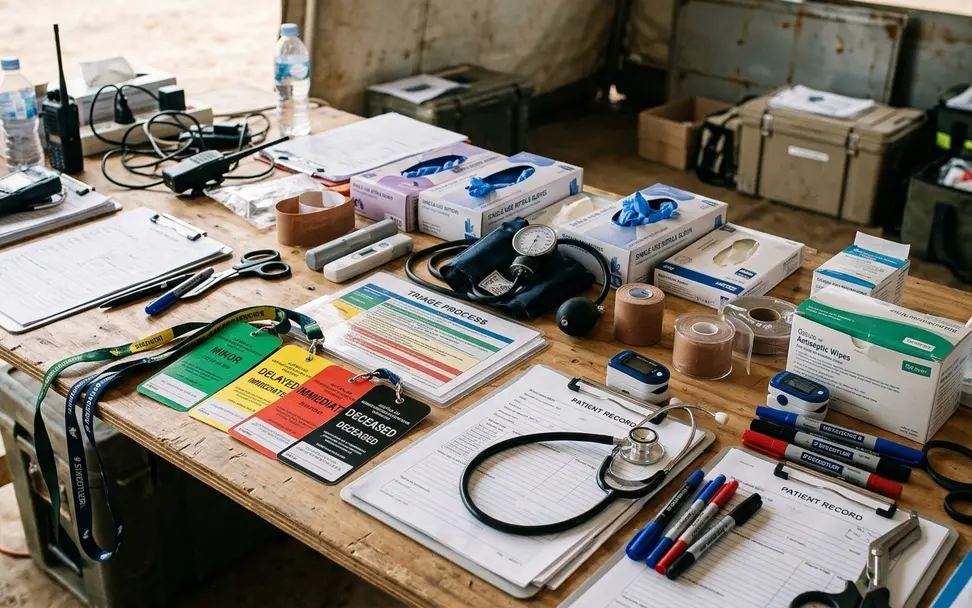
- Read the enclosure first. Preserve sleeve numbers, handwritten captions, sequence marks and processing notes before moving the negative.
- Check for odor and distortion. Vinegar odor, channeling, buckling and tight longitudinal curl indicate acetate deterioration at different stages.
- Inspect the image layer. Look for edge lifting, reticulation, scratches and areas where the emulsion has begun separating from the base.
- Identify biological contamination. Mold may appear as branching filaments, powdery deposits or irregular spots. Suspect material belongs in isolation until its condition is understood.
- Assign a capture priority. Actively degrading, historically significant and physically unstable rolls move ahead of clean, flat polyester negatives.
Cold storage controls the pace of loss. Freezing or refrigerating acetate film can halt further acetic-acid off-gassing, yet it cannot reverse existing emulsion shrinkage or base warping. Some severely damaged frames will yield only partial visual information, and triage must preserve those fragments without presenting them as complete records.
Storage decisions should also account for the film format and enclosure. The National Archives guidelines on film preservation provide useful background on film-base identification, deterioration and controlled storage.
Log Entry 03: Chemical Stabilization and Cleaning
Location: Treatment Room | Ventilation: Active | Focus: Surface Contaminants
Cleaning begins with the least aggressive tool. Every extra contact places pressure on an image layer already carrying decades of chemical and mechanical strain.
A Controlled Cleaning Sequence
- Place the negative emulsion-side up in a clean, illuminated work area and examine it without flexing the base.
- Use a bulb blower to dislodge loose particles. Keep the nozzle clear of the film surface and avoid directing debris toward adjacent frames.
- Pass a clean anti-static brush lightly across stable areas. Stop when the brush encounters lifting emulsion, tackiness or fixed deposits.
- Separate suspected mold from ordinary dust. Aggressive brushing can spread loose contamination and remove softened image material.
- Reserve archival-grade film cleaner for stable film that cannot be cleared through dry methods.
A brief immersion in a non-aqueous film cleaner was tested on expendable strips carrying heavy particulate matter. Microscopic edge-fraying appeared on test material from 1992, so the immersion method was discarded. The result established a narrower treatment threshold: solvent should be localized, brief and preceded by inspection of the emulsion edge.
Where a hexane-based archival cleaner is necessary, active ventilation allows the solvent to evaporate within 3 to 5 seconds. That short interval limits prolonged chemical contact with the fragile silver gelatin layer. It does not make solvent use routine; it defines the operating window for material judged stable enough to tolerate treatment.
Cleaning Threshold
Image detail takes precedence over cosmetic cleanliness. A fixed speck retained in a digital capture is preferable to a clean surface with missing emulsion.
Each intervention belongs in the treatment record, including the tool used, the area cleaned and any change observed afterward. This information helps later custodians distinguish original damage from preservation handling.
Log Entry 04: High-Resolution Digitization
Location: Copy Stand | Light Source: 99 CRI LED | Lens: 100mm Macro
Warped acetate drove the choice of a camera-scanning rig over a dedicated virtual drum or conventional flatbed scanner. Flatbed pressure plates can force a cupped negative against glass, concentrating stress along the emulsion’s raised edges. On severely distorted acetate, that pressure can cause irreversible micro-fractures.
Camera Rig Configuration
The capture assembly uses a rigid copy stand, a level film carrier and a 99 CRI LED source set to 5500K. A 100mm 1:1 macro lens at f/8 supplies edge-to-edge sharpness across the 24×36mm frame while maintaining enough working distance for the carrier and light table.
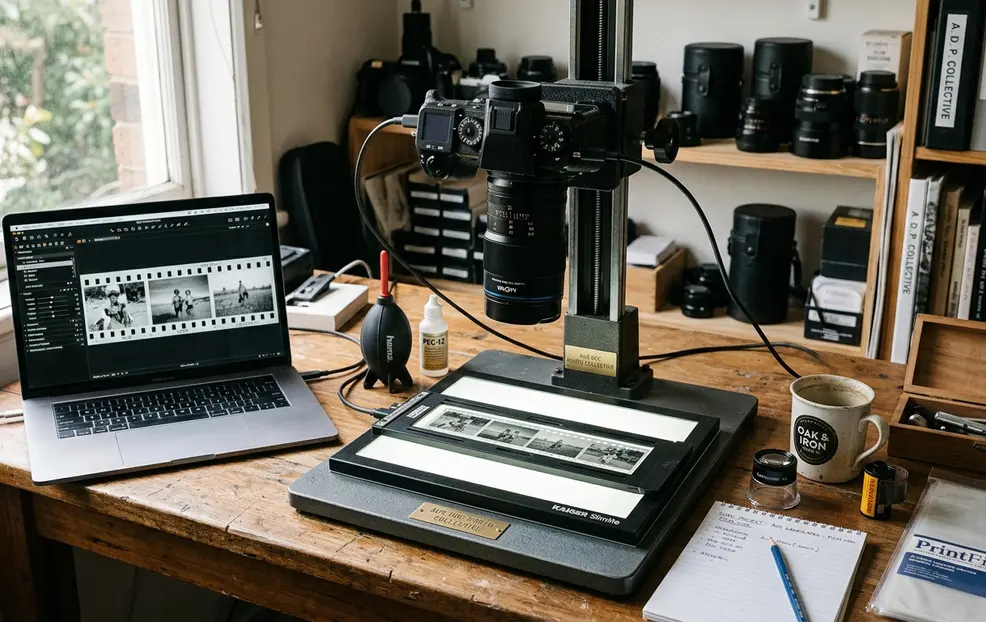
- Copy stand: Holds the camera sensor parallel to the film plane and prevents small alignment shifts between exposures.
- High-CRI light source: Provides consistent illumination for reproducing density and color information.
- Macro lens: Resolves the complete 35mm frame without relying on the optics built into a flatbed scanner.
- Film carrier: Supports the edges while leaving the image area unobstructed.
- Anti-Newton ring glass: Controls difficult curvature where the emulsion can tolerate gentle, distributed restraint.
Flatness Without Force
Film flatness and film safety often pull in opposite directions. A rigid carrier produces consistent focus on stable negatives, while badly cupped acetate may require a looser support and several focus checks across the frame. Anti-Newton ring glass can reduce curvature and suppress interference patterns, but it should never be used to crush a resistant negative into plane.
The operator first aligns the carrier, focuses on the grain near the center and checks the corners at capture magnification. If one edge falls outside the acceptable focus plane, the film is repositioned rather than compressed. A small border around the exposed frame should remain in the master capture because edge markings, frame numbers and physical damage can carry evidentiary value.
Traditional flatbeds remain efficient for clean, flat material. Camera scanning earns its place when the archive contains mixed distortion, brittle edges or frames requiring individual handling. Its advantage lies in controlled support and repeatable geometry rather than speed alone.
Log Entry 05: Metadata and Contextualization
Location: Digital Workstation | Standard: IPTC Core | Status: Cataloging
A high-resolution TIFF without context becomes an isolated rectangle. Its historical value depends on names, dates, locations, sequence and authorship surviving alongside the pixels.
From Sleeve to TIFF
Faded sleeve annotations are mapped into IPTC Core fields, with priority given to Headline, Caption/Description, location, date and creator information. The transcription preserves uncertain wording rather than silently repairing it. An illegible place name, for example, remains marked as uncertain until another part of the archive supports an identification.
- Photograph or transcribe the original sleeve before removing its negatives.
- Match frame numbers and visible edge codes to the digital files.
- Enter the photographer’s wording in the appropriate descriptive fields.
- Separate observed content from supplied captions, especially where conflict-era notes use outdated or partisan terminology.
- Embed the completed IPTC record directly in the TIFF master and verify that the fields remain readable after saving.
Cross-referencing handwritten field notes with a digitized roll of 36 exposures takes between 12 and 18 minutes, depending on the legibility of the photographer’s shorthand. That interval often resolves ambiguities that image recognition alone cannot: whether two similar shorelines belong to the same island, whether a sequence crosses a date boundary, or whether a name identifies the subject or the person who delivered the film.
Standard archival metadata practices keep the files searchable across future catalog systems used by historians and gallery curators. Interoperability depends on disciplined field mapping and faithful transcription. A polished caption with an unsupported identification weakens the record, while a clearly marked uncertainty gives future researchers something they can test.
Context Survives
Retain original captions even when later research adds corrections. Record the revision separately so the TIFF carries both the historical annotation and the evidence-based interpretation.
Log Entry 06: The Final Frame
Location: Archive Vault | Status: Secured | Mission: Ongoing
A baseline physical audit of a 1,000-roll archive requires 15 to 20 hours of dedicated inspection to identify and isolate actively degrading acetate bases. The work becomes manageable when it starts as an inventory rather than a full restoration campaign.
Start With the Vulnerable Rolls
Open the archive cabinet and list each enclosure in its existing order. Mark rolls that smell of vinegar, resist lying flat, show edge curl or carry visible mold. Move those items into controlled isolation, photograph their enclosures and schedule digitization before stable material.
The final frame is rarely the most dramatic image in the box. It may be an uncaptioned shoreline, a civilian waiting beside a damaged road or the last intact exposure before an emulsion fracture. Careful handling and precise metadata allow that fragment to remain part of the historical record.
When you inspect your own aging negatives, which curling or vinegar-scented roll will you choose to save first?